If you have OneNote installed on your MacBook and you need to back it up, this is the guide you need to follow. It's a more technical procedure than on a PC, but if you follow the steps below, anyone can do it.
You will need a USB stick to make your backup.
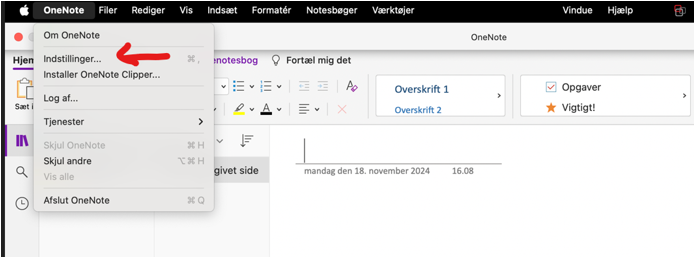
Step 1: Open the OneNote APP
Step 2: Go to Settings
Click 'OneNote' in the menu bar at the top next to the Apple logo and select 'Preferences'.
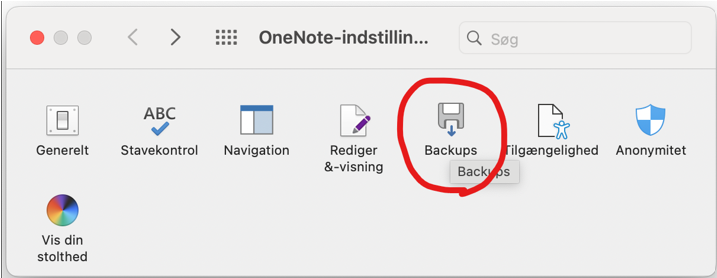
Step 3: Select Backups
Go to the 'Backups' tab (the icon looks like a floppy disk).
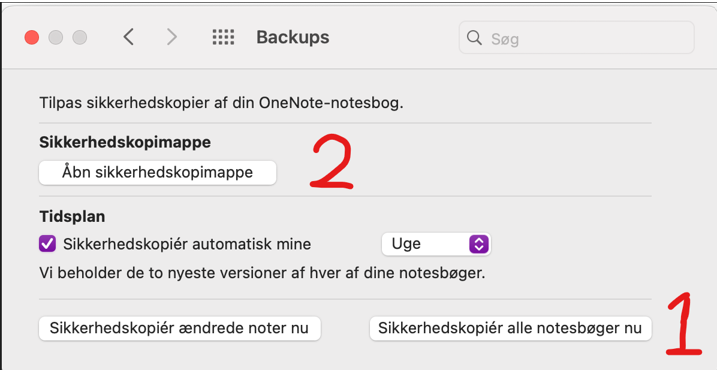
Step 4: Take a manual backup
Click “Back up all notebooks now” (1) to take an immediate backup.
You may want to click on “Open backup folder” (2) instead of navigating as described in step 5.
Step 5
- Plug the USB memory stick into your Mac.
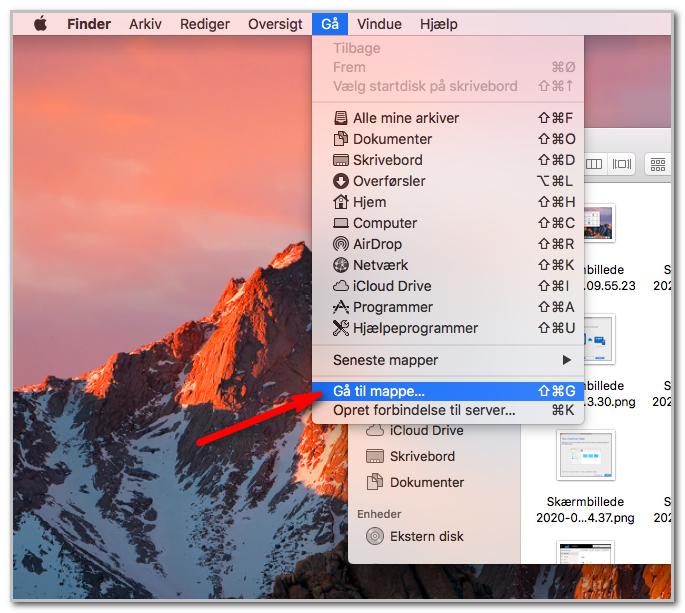
- Open Finder and select Go.
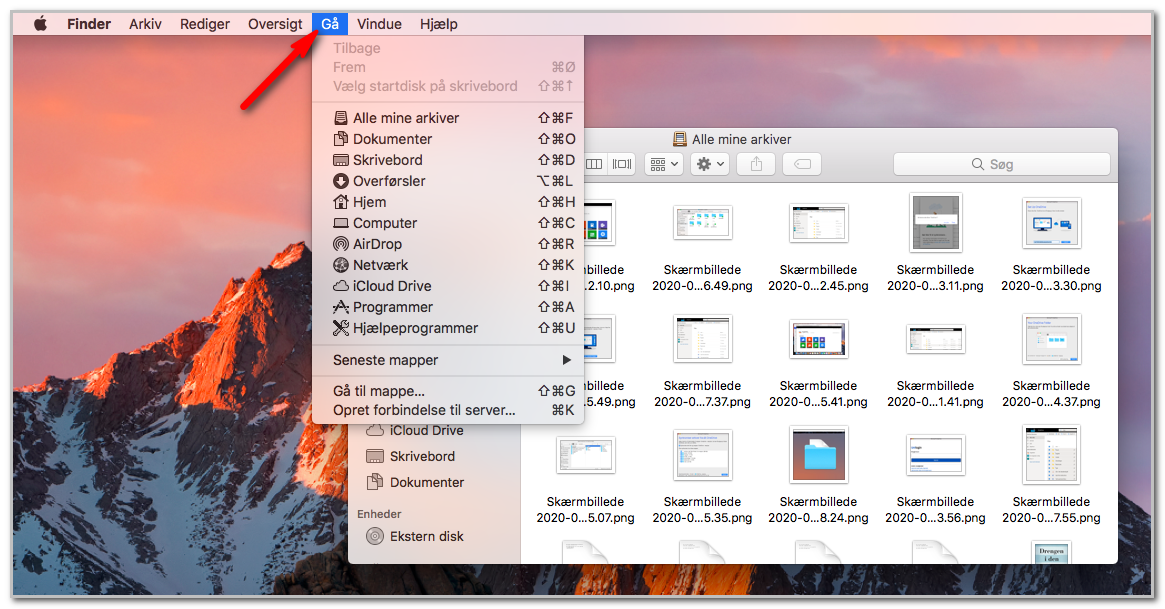
- Here you select the Go to folder function...
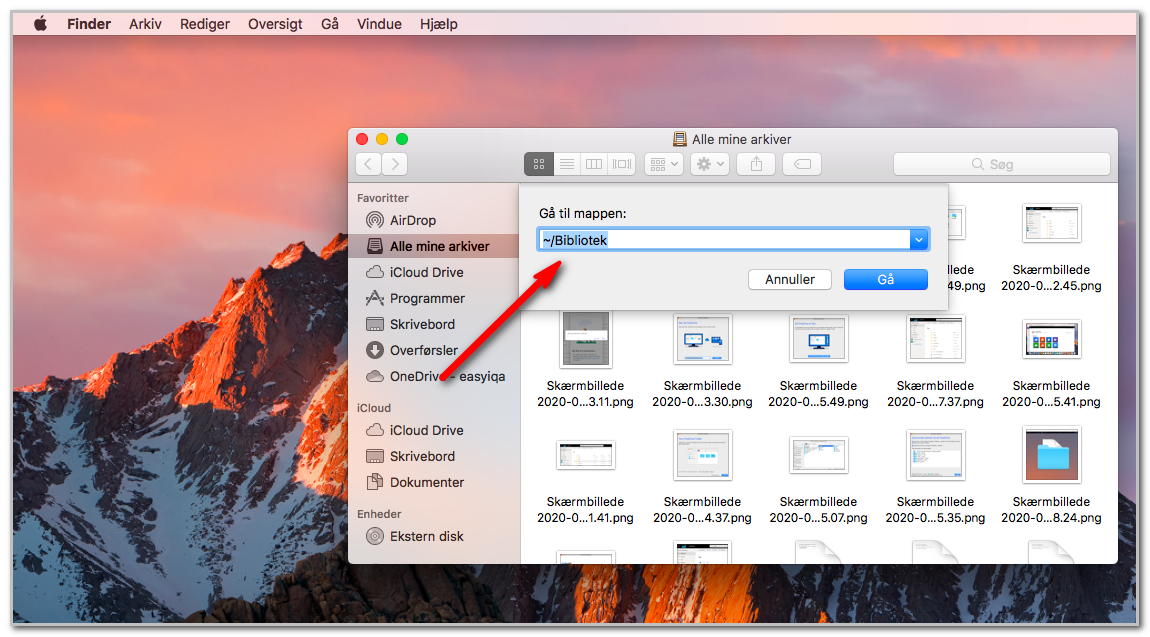
- Now type the following in the search field ~/Library/ (Tilde, which is the wave character, must be included)
- From here, click through quite a few folders in the following order:
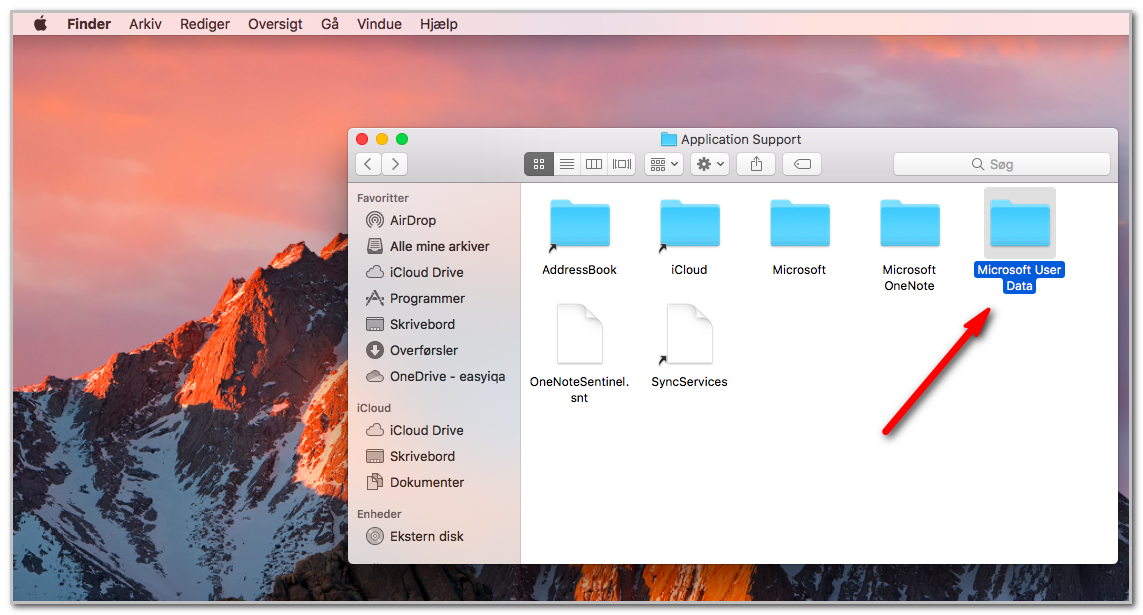
- Containers /com.microsoft.onenote.mac / Data / Library / Application Support / Microsoft User Data (If you choose to copy this "path", paste it without spaces in the "go to folder" after ~/Library/)
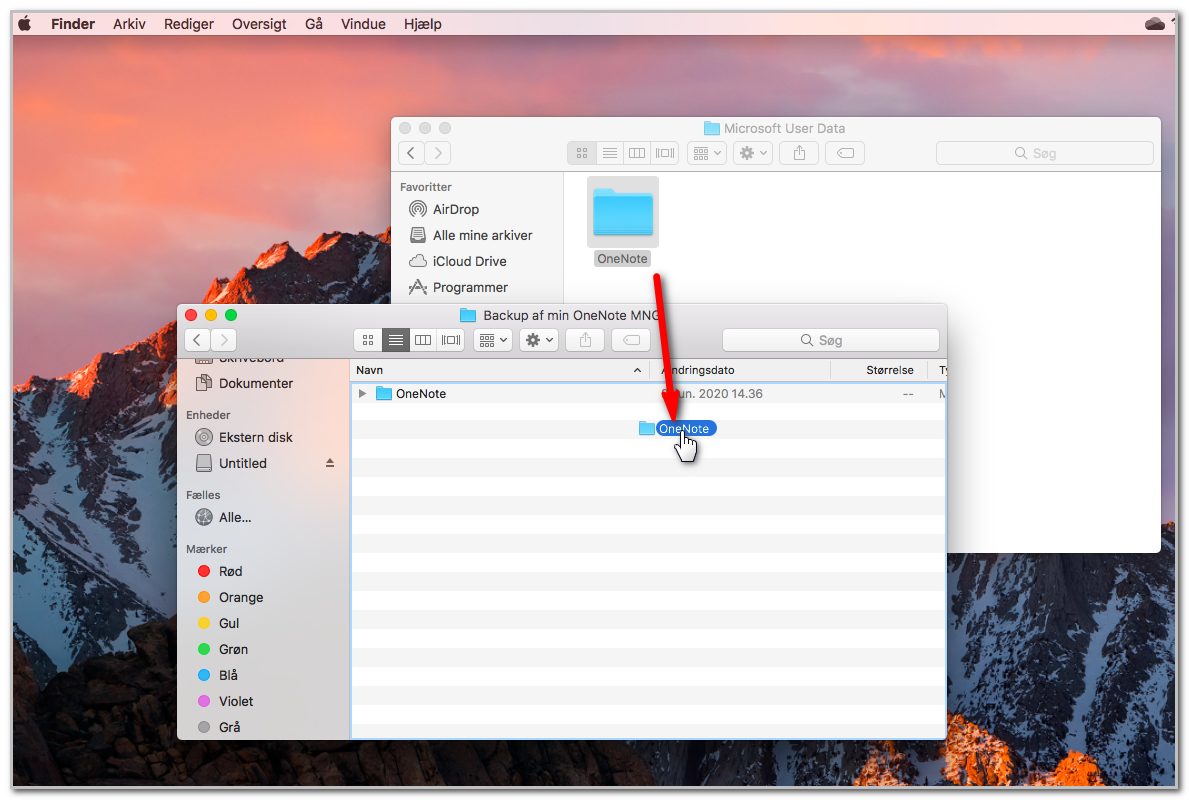
- NOTE! As shown in the image below, select the Microsoft User Data folder and not the Microsoft OneNote folder.
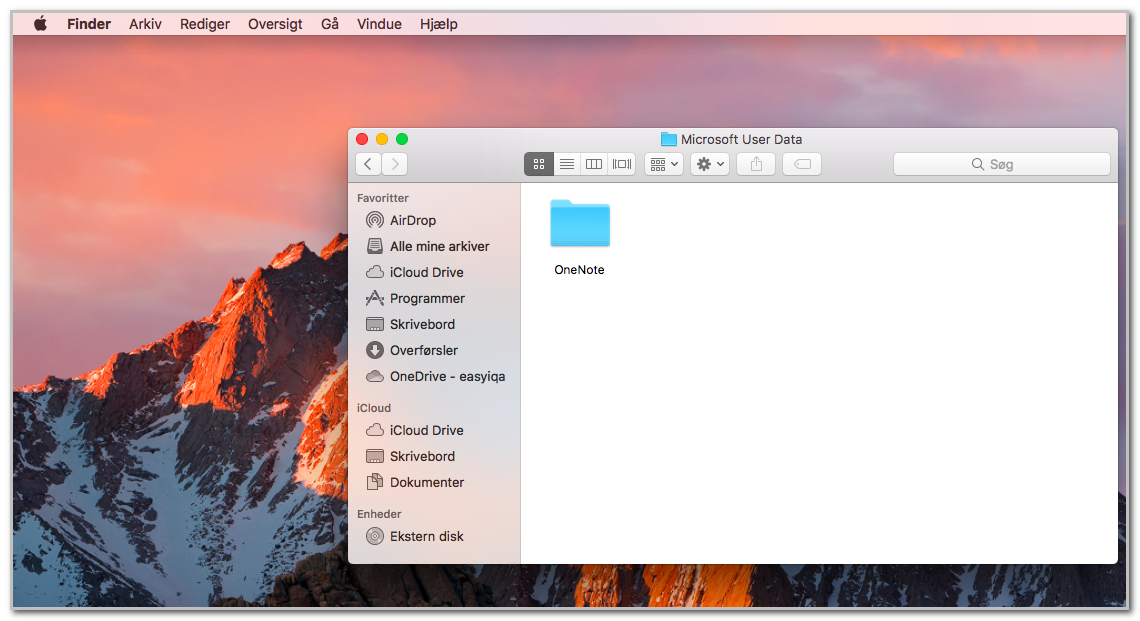
- You are now in the OneNote folder that you need to copy to your USB stick.
- Open a new Finder window and drag-and-drop the folder onto your USB stick in the new Finder window.
Your OneNote is now copied to your USB stick.
To open your OneNote file on a new computer or after a change of school, where you also change Office365 license to your new organization, follow the instructions below.